


adamcpahl22
-
Posts
10 -
Joined
-
Last visited
Content Type
Profiles
Forums
Gallery
Events
Blogs
Posts posted by adamcpahl22
-
-
Nicely done, even if it is lucky.
10/10
Just don't do it again :wink:
-
7/10, as most of it was probably trained as a member
-
It was pretty lucky but I've been pretty unlucky at other bosses. All my teammates were LONG overdue :-|.
Going to spend on 88 summoning and 99 construction/magic I think.
-
WTH I got 85 Slayer from Waterfiends... grats on the level :grin:
-
Ok, firstly this was my first ever trip to Armadyl GWD. ;)
Secondly, don't flame about the gear I wasn't welfaring I tried to buy ACP and ASkirt but stupid "merchers" are buying them out and couldn't pick any up.
Thirdly, the trip started as a 4man team, then a teammate was killed but returned before the first hilt. That same person left before the Skirt. For this reason the killcounts don't reflect how many times Kree was killed.
[hide=Hilt 1 (kill 19)]
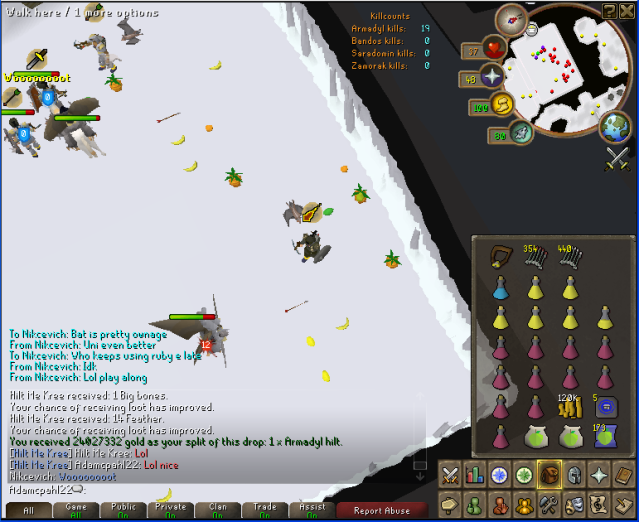 [/hide]
[hide=Hilt 2 (kill 23)]
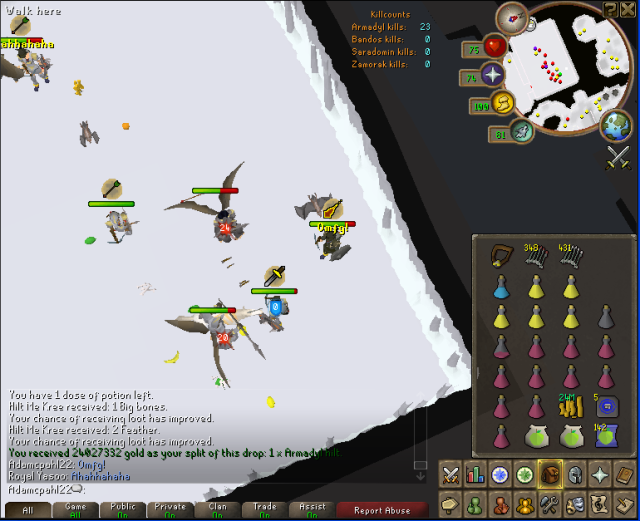 [/hide]
[hide=Skirt (kill 35)(3man)]
 [/hide]
[hide=Shard2 (kill 47)(3man)]
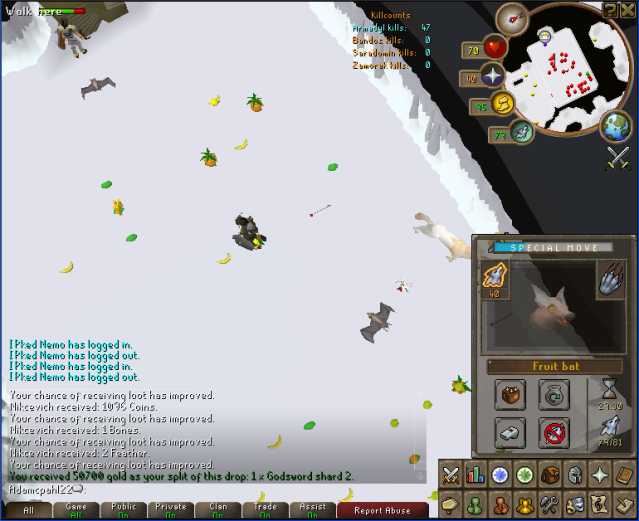 [/hide]
53.5M+ TYVM!
rate/hate/envy your choice
-
Nice drops and nice bank but I own your stats, for now...
-
I said that it wasn't the fastest in the first few lines of the Introduction :
-
The agility arena is fun for about 50 tickets, then it gets very boring...
I think that training in wild on pvp/bh world (pvp would probably be better) is more benneficial. You can risk 75k, and gain drop potential and it's better xp. Throw in brawler gloves and it's massive xp.
I never said that Agility Arena is the best experience in the game. Ape Atoll and Dorgeshuun are much better experience rates to start. Wildy is probably about the same but with brawling gloves is the best in the game.
The Agility Arena is useful for people who find lapping agility courses incredibly tiresome, skillers or anybody who wants a relaxed way of training.
It's good because there's plenty of down time between arrow movements and during long obstacles to go and browse forums or whatever.
-
If only it didn't take roughly 17 hours to get 1k tickets... :roll:
Well, it can't be more fun and better experience as well can it? 8-)
-
Nice guide! 9/10. Only wish you could mention if its better than wildies course or ape atoll course at :thumbsup:
Ok, good idea. I've never actually done either of the courses lol. I suspect ape atoll will be faster and wilderness about the same.
Right, great guide. Plenty of great info. Could use with a few more pictures, not that's optional at this point.Thanks!
First is just technical. Add gp and xp/hour rates. Gp for cost of food/energy pots if used.I will update this probably :
Second is that if you continuously go through the Spinning Blade obstacle (after about 50 or so agility or whenever you can reliably pass them) after you get your ticket, you can roughly double the xp per hour you get.Last if that you can alch while running. If you do this, during the duration of the alching animation, you will not lose any run energy. This allows you to run for an extremely long period of time.Ok, thanks. I'll try it out and update as necessary.
Lol first 2 posts were made by Guildees :DAnd btw do chocolate cakes heal more than cakes ?
They do, but I think it's only like 3hp more. It's not worth the 200 extra gp.
It's best to either buy or steal regular cakes, then buy chocolate from the Lumbridge Culinaromancer's Chest or Gnome Stronghold. They cost only 26 and 20gp respectively.
Thanks for the comments.
-
that doesnt explain ANYTHING. there is no logic behind your "chopping together is better" AT ALL. it makes trees fall sooner and you have to wait for them to grow, wasting time. as having more people on a tree doent help one person get individual logs faster then your logic is completley backwards and has no sence to it. either that, or you need to explain it betterLook my ideas sound. I put it the best why I could if you don't get it fine. I give up on all yall ppl hatting on me. You all are taking every thing I said and twisting it around. For examplehave cut in crowded areas and empty ones. i always. ALWAYS get faster logs alone, than i ever have with a crowd.I never said anything about getting logs faster the more ppl u have on a tree. I said it doesn't effect the cut rate. MY MAIN POINT WAS CUTTING BY YOURSELF DOESN'T GET YOU LOGS FASTER. And if you cut as a group the CHANCES are higher that the trees will grow back and they all get chopped down less often. Of coarse the less ppl chopping in one area gets you logs faster. Thats because your having to move less. But when ppl lots of ppl are around the better option would be to chop together.
if it is a random number generator that decides if a tree falls, wouldnt more people give it more of a chance to fall within the given time, thus giving you a smaller chance to get a set # of logs? and if there is a swarm of people, it would make all other trees fall faster, meaning you wait wile they spawn to get more logs, wasting time, potential exp and moneyI stated that right here. Did you even read it?
The only ways if affects you is is when have have more than one person on a single tree the chance of that tree getting knock down sooner is more. This is because you have not one dice rolling for that unlucky number but multiple dices at once.Oh and I stated it don't work all the time but it does most of the time. Just depends how many dice you have rolling(players chopping) But even half the time is better and more xp and more money. Enough ppl start doing it, it could get popular and move around enough to make a difference.
"And if you cut as a group the CHANCES are higher that the trees will grow back and they all get chopped down less often."
wait, are you saying having multiple people on a tree makes it last for longer? or am i misreading it. coz i coulda sworn thats what you said
and for the last quote in there, you never actually explain properly how having more people helps in anyway, AT ALL. all it does is make trees fall sooner
What I think that icebox64 is trying to say is that; whether there's 1 or 10 people cutting the same tree, YOU will always get logs from that tree at the same rate regardless. You will probably get less experience and logs per hour, however, as there's a higher chance that you will have to spend time waiting for a tree to respawn as when there are more people, the trees get chopped down faster (Think of the Stealing Creation Trees, whether your alone or with 20 people cutting at the same time, it's always the same speed except it will fall quicker with more people cutting it).
Assuming that you had a tree that never got chopped down, your woodcutting speed is completely unaffected by how many are chopping it.
Do you get it now?!?!
The second problem of cutting together being more efficient or something along those lines is more difficult to explain.
If there are 5 players cutting 5 trees (as an example, yews). If they each cut there own tree and start simultaneously, the trees are likely to fall around the same time. When all 5 are down, what do you know you have to wait around for a minute or 2 doing absolutely nothing = lots of wasted time.
If those 5 players started on 1 tree and went 1 tree at a time, by the time the last tree falls, the first tree will be spawned or very close to it = low or no wasted time.
Do you get it now?!?!
-
omg ur sig rick-rolled me...
-
It's hopeless to try and spread this information. It seems perfectly plausible to me but convincing people who don't think logically isn't going to work. It's like the Egg cannon at Barbarian Assault. People will never understand that you don't lose points for using that, even though there is an option to say it in the Quick Chat!
-
Pretty good stats, though you are combat-heavy. Not very much cash for your level I'm afraid :thumbdown: 5/10 bank but 1800/2376 or 7.58/10 stats :
-
lol, just did 3154 cosmics through abyss in 1 abyssal lurker without any energy potions. Works out to be 4616 cosmics per hour (2308 essence), with giant pouch (76 rc). Without giant I could do about 1400 per lurker without energy potions (about 2000-2100 per hour).
EDIT: Just did another lurker with 3038 cosmics (had to recharge glory amulets). Still though, 2260 essence per hour. And same conditions (no energy pots).
gratz on a succesfull troll. i dont have giant pouch (as dr jay mentioned) and i dont have summoning levels. gfson
Why does everyone say you didnt have giant? I told you I can do over 2000 per hour with a large with lurker without energy pots.
This just isn't that great an achievement, sorry. Thousands of people can probably do this just as fast, if not faster, and that's why nobody bothers to state how many they can do on rate this.
2k per hour on large without summon is fast, but not spectacular. Do 2.2k and I'll be impressed.
-
-
1.0 Introduction
Hi, and welcome to my guide for training Agility at the Brimhaven Agility Arena. The Arena isn't as fast experience as other methods of training like Dorgeshuun or Ape Atoll courses, but has a unique style to it that I find (and I hope you will too) much more entertaining and less monotonous than the various agility courses.
2.0 Basic Overview
The Brimhaven Agility Arena is an obstacle course where you, the player, can train Agility. Most Agility courses involve repeating the same lap over and over again, granting experience for each obstacle and each successfully completed lap. The Agility Arena is different from this in several ways.
The experience gained from the obstacles in the Arena is mediocre at best compared to other courses. However, the object of this course is to collect Agility Arena tickets which can be exchanged for experience or item rewards.
The Arena comprises of 25 platforms, each with a Ticket Dispenser on it (except the entrance platform). Each minute, the arrow will move to one of these 24 dispensers and you must try and reach the dispenser in time to recieve an Agility Arena ticket.
There is no "lapping" aspect to this course. You have to navigate through the course and recieve tickets from the dispensers by choosing your own path. There is no bonus experience for successfully completing a lap, however, you could consider the bonus experience of the ticket to be the lap bonus experience.
3.0 Requirements and Suggestions
There are no requirements to use the Brimhaven Agility Arena other than 200gp to get in.
There are many suggestions that I have for skills, quests, equipment and inventory that I have though.
3.1 Skills:
- [*:3s18a9fv]I highly recommend having at least 40 Agility. You can participate here with as little as 1 Agility, but you are severely shackled as you can't pass through many of the obstacles. I will go into further detail later on.
[*:3s18a9fv]Various other skill requirements from quests and items explained in a moment.
3.2 Quests:
- [*:3s18a9fv]It is entirely optional, but completing the Rocking Out quest will allow you free access to the Arena.
3.3 Equipment:
There are a variety of items you can wear when at the Arena, but the main idea is to weigh as little as possible.
Helmet: Nothing
Cape: Spottier Cape > Spotted Cape > Nothing
Amulet: Nothing > Charged Amulet of Glory
Ammunition: Nothing
Weapon: Enhanced Excalibur > Nothing
Torso: Nothing
Shield: Nothing
Bottoms: Nothing
Gloves: Karamja Gloves 2 or 3 > Penance Gloves > Bracelet of Regeneration > Nothing
Boots: Boots of Lightness > Nothing
Ring: Explorer's Ring 1, 2 or 3 > Nothing
The Spottier Cape is the best weight reducing cape, followed by the spotted cape.
A Charged Amulet of Glory is useful as a method of getting to and from the Arena.
Enhanced Excalibur is a very handy item here. It's special ability replenishes 4hp every 2 seconds for 10 seconds (20hp) and raises defence by 15%. Use no weapon without this.
Karamja Gloves 2 and 3 provide 10% bonus experience from all obstacles and rewards from the Arena. Penance Gloves reduce weight. Regen bracelet doubles health regeneration.
Boots of Lightness reduce weight.
Explorer's Ring 1, 2 and 3 provide daily energy restoration which can be used in the Arena effectively. Also provides a method of getting to and from Arena (for Ring 3).
3.4 Inventory:
In the inventory, you will need 1 space for money, 1 space empty (for tickets), and the rest filled with food. There are variations depending on the items you use and how you plan to get to the Arena which I will go into.
You will need 200gp to enter the Arena, payable to Cap'n Izzy No-Beard.
If you have completed Rocking Out, you wont need any money to get into the Arena, so you can carry up to 27 food.
However, if you are coming from Shilo Village via the cart you will need 10gp.
And, if you are coming from Ardougne via the boat you will need 30gp.
This is some examples of the recommended inventories based on what items and methods of travel you'll be using/taking (refer to 4.0 Getting There for the methods to get to the Arena).
[hide=Using Boats]
 [/hide][hide=Using Cart]
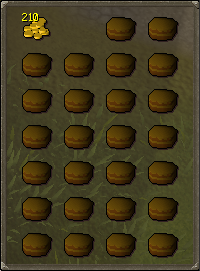 [/hide][hide=Using Glory]
 [/hide][hide=Using House]
 [/hide][hide=Slightly less than 40 Agility]
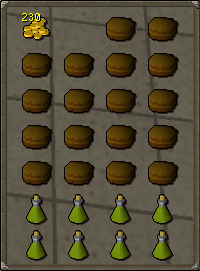 [/hide][hide=Over 40 but may need Agility replenishment]
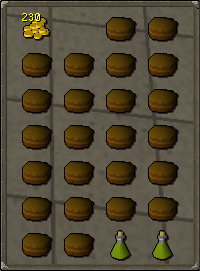 [/hide][hide=Extra Energy]
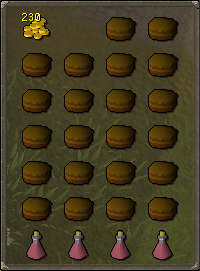 [/hide]
There are many different types of food that you could use at the Arena. You will be wanting to keep your health below 20hp when at the Arena so that you only take 2 damage maximum from a failed obstacle. Above 20hp, this damage will increase.
Some good options are:
Chocolate Cake - Heals 15 per item (3 bites)
Cake - Heals 12 per item (3 bites)
Basket of Strawberries - Heals 30 per item (5 bites)
Pineapple Pizza - Heals 22 per item (2 bites)
Anchovy Pizza - Heals 18 per item (2 bites)
Monkfish - Heals 16 per item (1 bite)
Swordfish - Heals 14 per item (1 bite)
Lobster - Heals 12 per item (1 bite)
Saradomin Brew - Heals up to 56 per item (4 doses)
Chocolate and regular cakes are fairly common as the chocolate can be easily bought in the Lumbridge Culinaromancer's Chest and at the Gnome Stronghold and the cakes can be quickly theived from the baker's stall in the Ardougne marketplace. Baskets of Strawberries are also a good choice here, along with pizzas and Saradomin Brews (for players with higher hitpoints levels).
Note that if you are using the Enhanced Excalibur, food is almost unnecessary as the special ability will be all the health you will need. Take a couple food items just in case anyway.
If you're only just below 40 Agility or just over and worried you might fail darts and fall below 40, you can bring Agility Potions as well. And if you want you could bring Energy Potions as well to restore energy.
4.0 Getting There
There are several ways to get to the Arena. Ordered Worst to Best.
1- Make your way to Port Sarim (Explorer Ring 3 works best). Pay 30gp to take the boat to Karamja and walk west to the Arena.
2- Use the Glory Amulet to teleport to Karamja and walk west to the Arena.
3- From Ardougne, pay 30gp to take the boat to Brimhaven. Walk east to the Arena.
4- Use Karamja Gloves 3 to teleport to Shilo Village. Pay 10gp to take the cart and then walk east to the Arena.
5- Set up a house in Brimhaven and use a Teleport to House teletab and then exit house. Walk east to Arena.
Once you reach the Arena entrance, pay Cap'n Izzy No-Beard his 200gp entrance fee and descend the ladder (or just descend if completed Rocking Out).
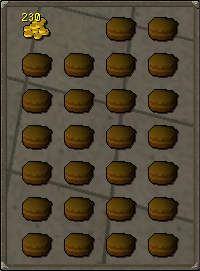
5.0 The Arena
The Arena is a 5x5 array of platforms, each linked by different obstacles. The obstacles take varied amounts of time and require different agility levels and have longer recovery times and so on.
When you first come to the Arena (either through the entrance ladder, logging in or from a random event) the signal in the top right corner will be red. This means that you won't recieve a ticket from the next dispenser you correctly tag. The signal will turn green and this means that when you tag the correct dispenser, you will recieve a ticket. If you don't make it in time, the signal will turn back to red.
The Low-Level obstacles have a requirement of 1 Agility and include:
Low wall (8 exp)
Rope Swing (20 exp)
Ledge (16 exp)
Log Balance (12 exp)
Pillars (18 exp)
Plank (8 exp)
Monkey Bars (14 exp)
Rope Balance (10 exp)
Saw Blade (0 exp)
The Medium-Level obstacles have a requirement of 20 Agility and include:
[bleep]e Jump (24 exp)
Pressure Pads (26 exp)
Hand-holds (22 exp)
The High-Level obstacles have a requirement of 40 Agility and include:
Spinning Blades (28 exp)
Darts (30 exp)
6.0 What to Avoid
There are 2 obstacles that you should avoid unless you absolutely must use them to get to the dispenser in time.
The Hand-holds seem to have a very high chance of failure, they take a long time to pass, and they have a long recovery time. Avoid if possible.
The Darts also have a very high chance of failure and take a long time to pass. They have no recovery time but if you fail this obstacle, they lower your agility level by 1 or 2. This can add up to many levels over a short period of time and can lower your agility below 40 so that you can't successfully finish either the darts or the spinning blades. Avoid is possible.
In most cases, these 2 obstacles can be avoided easily, but sometimes you simply must do them.
All the low-level obstacles are pretty safe and can be passed quite easily at above 40 Agility. The others ([bleep]e Jump, Pressure Pads and Spinning Blades) are the obstacles that will cause the most damage to you. Pass these as little as you can, but don't be hesistant to pass them.
Also note that while you shouldn't avoid the Saw Blade obstacle, it relies completely on your timing. If you suffer from lag, you will most likely pass, but take damage from this obstacle. If you have low reaction time, you will most likely fail. Other than that, the other obstacles are simple enough.
7.0 Technique
Keep you're Hitpoints level below 20, if possible, to take the least amount of damage from a failure. Using food such as cakes, that heal small amounts in several bites, is a good idea as it keeps health low so that damage recieved will almost always be only 2.
If you are new to the Arena, don't let your health fall below 10 as you could lose concentration and accidentally die. Most experienced players can go below 5 before eating.
---
This picture shows the layout of the Arena, with North being at the top. Thanks to Tip.It for the original picture, I just added numbers to the platforms. Note: Hold Shift and click this to open up in a new window. Helpful when reading the orders later on.
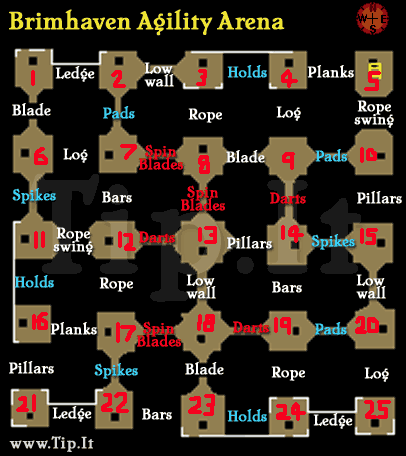
Ideally, you want to be at Platform 13 when the arrow changes to a new position. This position give you the best chance to get to any of the other platforms in time.
If you start at Platform 13 when the arrow moves, there is almost no chance you will miss the ticket unless you are really unlucky and failed like 10 Spinning Blades in a row.
Note that Platform 5 has an entrance and exit ladder instead of a dispenser. The arrow will never go here.
---
From Platform 13, I will explain the best ways to get to each platform. I will state whether they are fast or slow and how much damage you are likely to take. I'll asterisk (*) the ideal route if there's more than 1 way.
After each tag, make your way as back as well.
Platform 1:
There:
13 - 8 - 3 - 2 - 1 (slowest but low chance to take damage)
13 - 8 - 7 - 2 - 1 (fastest but high chance to take damage)***
13 - 8 - 7 - 6 - 1 (medium speed but high chance to take damage)
Back:
1 - 2 - 3 - 8 - 13 (slowest but low chance to take damage)***
1 - 2 - 7 - 8 - 13 (fastest but high chance to take damage)
1 - 6 - 7 - 8 - 13 (medium speed but high chance to take damage)
Platform 2:
There:
13 - 8 - 3 - 2 (slower but less chance to take damage)
13 - 8 - 7 - 2 (faster but more chance to take damage)***
Back:
2 - 3 - 8 - 13 (slower but less chance to take damage)***
2 - 7 - 8 - 13 (faster but more chance to take damage)
Platform 3:
There:
13 - 8 - 3
Back:
3 - 8 - 13
Platform 4:
There:
13 - 8 - 9 - 4 (faster and less chance to take damage but must go through saw blade)***
13 - 8 - 3 - 4 (slower and more chance to fail at the hand-holds)
Back:
4 - 9 - 8 - 13 (faster and less chance to take damage but must go through saw blade)***
4 - 3 - 8 - 13 (slower and more chance to fail at the hand-holds)
Platform 6:
There:
13 - 8 - 7 - 6
Back:
6 - 7 - 8 - 13
Platform 7:
There:
13 - 8 - 7
Back:
7 - 8 - 13
Platform 8:
There:
13 - 8
Back:
8 - 13
Platform 9:
There:
13 - 8 - 9 (must go through saw blade)
Back:
9 - 8 - 13 (must go through saw blade)
Platform 10:
There:
13 - 8 - 9 - 10 (faster but more chance to take damage and must go through saw blade)***
13 - 14 - 15 - 10 (slower but less chance to take damage)
Back:
10 - 9 - 8 - 13 (faster but more chance to take damage and must go through saw blade)
10 - 15 - 14 - 13 (slower but less chance to take damage)***
Platform 11:
There:
13 - 8 - 7 - 6 - 11 (fastest but high chance to take damage)
13 - 8 - 7 - 12 - 11 (almost as fast and slightly less chance to take damage)
13 - 18 - 17 - 12 - 11 (medium speed and medium chance to take damage)***
Back:
11 - 6 - 7 - 8 - 13 (fastest but high chance to take damage)
11 - 12 - 7 - 8 - 13 (almost as fast and slightly less chance to take damage)
11 - 12 - 17 - 18 - 13 (medium speed and medium chance to take damage)***
Platform 12:
There:
13 - 8 - 7 - 12 (faster but high chance to take damage)
13 - 18 - 17 - 12 (slower but less chance to take damage)***
Back:
12 - 7 - 8 - 13 (faster but high chance to take damage)
12 - 17 - 18 - 13 (slower but less chance to take damage)***
Platform 13:
No movement required
Platform 14:
There:
13 - 14
Back:
14 - 13
Platform 15:
There:
13 - 14 - 15
Back:
15 - 14 - 13
Platform 16:
There:
13 - 18 - 17 - 16
Back:
16 - 17 - 18 - 13
Platform 17:
There:
13 - 18 - 17
Back:
17 - 18 - 13
Platform 18
There:
13 - 18
Back:
18 - 13
Platform 19:
There:
13 - 14 - 19
Back:
19 - 14 - 13
Platform 20:
There:
13 - 14 - 15 - 20 (faster but less experience)***
13 - 14 - 19 - 20 (slower but more experience)
Back:
20 - 15 - 14 - 13 (faster but less experience)
20 - 19 - 14 - 13 (slower but more experience)***
Platform 21:
There:
13 - 18 - 17 - 16 - 21 (slow but medium chance to take damage)
13 - 18 - 17 - 22 - 21 (fastest and highest chance to take damage)***
13 - 18 - 23 - 22 - 21 (slow but low chance to take damage and must go through saw blade)
Back:
21 - 16 - 17 - 18 - 13 (slow but medium chance to take damage)***
21 - 22 - 17 - 18 - 13 (fastest and highest chance to take damage)
21 - 22 - 23 - 18 - 13 (slow but low chance to take damage and must go through saw blade)
Platform 22:
There:
13 - 18 - 17 - 22 (faster but more chance to take damage)***
13 - 18 - 23 - 22 (slower but less chance to take damage and must go through saw blade)
Back:
22 - 17 - 18 - 13 (faster but more chance to take damage)***
22 - 23 - 18 - 13 (slower but less chance to take damage and must go through saw blade)
Platform 23:
There:
13 - 18 - 23 (must go through saw blade)
Back:
23 - 18 - 13 (must go through saw blade)
Platform 24:
There:
13 - 14 - 19 - 24
Back:
24 - 19 - 14 - 13
Platform 25:
There:
13 - 14 - 15 - 20 - 25 (fastest with medium chance of damage and medium experience)***
13 - 14 - 19 - 20 - 25 (medium speed with medium chance of damage and best experience)
13 - 14 - 19 - 24 - 25 (slowest with low chance of damage and medium experience)
Back:
25 - 20 - 15 - 14 - 13 (fastest with medium chance of damage and medium experience)
25 - 20 - 19 - 14 - 13 (medium speed with medium chance of damage and best experience)***
25 - 24 - 19 - 14 - 13 (slowest with low chance of damage and medium experience)
---
---
---
---
---
---
---
---
---
---
Of course, you're not going to always be at Platform 13 when the arrow moves. After several hours at the Arena you should get a "feel" for how long until the arrow will move. I don't suggest doing any obstacles that take a long time when you know you are close to an arrow chance. The arrow might be back in the other direction. Some obstacles to avoid when time is almost up are: Darts, Hand-holds, Pillars, Monkey Bars, Planks.
When you are waiting at Platform 13, you could do several things to pass the time. If you have a lot of time (15 seconds or more), you could do 2 of the Pillar obstacle from 13 - 14. They take roughly 8 seconds each way. If you are going to be waiting, but not quite that long you could do the Low Wall obstacle from 13 - 18. This is very safe and pretty fast. If you're feeling daring you could also try the Spinning Blade obstacled from 13 - 8. This has a medium chance of failure but lots of experience and isn't advised if low level.
If you have a very high Agility level, you could do the [bleep]e Jump, Pressure Pad, Rope Swing and Spinning Blade obstacles repetitively until the arrow moves. These are the quickest obstacles and provide good experience but are most likely to cause some damage to you. If you aren't using the Enhanced Excalibur, these can be a waste of food.
Another fairly common thing to do while waiting is to cast High Alchemy on items (usually Yew Longbows as they're relatively cheap). You could also fletch arrows and bolts while waiting as well.
8.0 Rewards
So what is the point of these Agility Arena tickets? Well, you can trade them in for experience and items. To trade tickets, you'll need to leave the Arena and speak to Pirate Jackie the Fruit, who is at the entrance next to Cap'n Izzy No-Beard.
The main reward from the Agility Arena tickets is to use them for experience. It's also possible to purchase Grimy Toadflax and Snapdragon and also the Pirate's Hook.
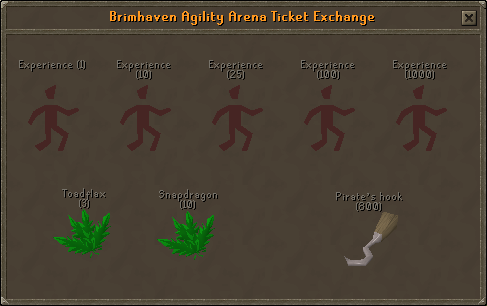
When cashing in the tickets, you need various amounts to purchase the different things.
- [*:3s18a9fv]The Pirate's Hook requires 800 Tickets and is worth 1.2-1.4M on the Grand Exchange.
[*:3s18a9fv]The Grimy Toadflax requires 3 Tickets per Herb.
[*:3s18a9fv]The Grimy Snapdragon requires 10 Tickets per Herb.
[*:3s18a9fv]The other 5 rewards hand out varying amounts of experience depending on how many tickets you're willing to spend at once.
1 ticket at a time gives 240 experience (240 total).
10 tickets at a time gives 248 experience each (2,480 total).
25 tickets at a time gives 260 experience each (6,500 total).
100 tickets at a time gives 280 experience each (28,000 total).
1000 tickets at a time gives 320 experience each (320,000 total).
Almost everybody purchases experience with their tickets as the time spent to get the items isn't worth it. When you are going to purchase experience, I would recommend only buying 25, 100 or 1000 at a time.
If you are below level 45, then 25 at a time is probably best for you. Even though you get less experience than the other options, the experience you gain will give you a better chance to get more tickets when you go back into the Arena.
From about 45-60, cashing 100 at a time is good as you gain 1 or 2 levels from each purchase, which increases the chances to gain tickets.
After level 60, you can easily get more than 95% of the tickets from the dispenser without missing any. This is when it's best to save up for 1000 tickets at once to get the most experience per ticket.
Note: The Karamja Gloves 2 and 3 provide a 10% bonus to all experience gained in the Arena as well as when purchasing the reward experience. Especially when cashing in tickets, make sure to use Karamja Gloves 2/3! When trading 1000 tickets, you will gain 352,000 instead of 320,000 experience, which is 32,000 more.
9.0 Credits
JaGex - For making RuneScape
Tip.It - For helping millions of players play RuneScape and providing this wonderful forum.
- [*:3s18a9fv]I highly recommend having at least 40 Agility. You can participate here with as little as 1 Agility, but you are severely shackled as you can't pass through many of the obstacles. I will go into further detail later on.
-
lol, just did 3154 cosmics through abyss in 1 abyssal lurker without any energy potions. Works out to be 4616 cosmics per hour (2308 essence), with giant pouch (76 rc). Without giant I could do about 1400 per lurker without energy potions (about 2000-2100 per hour).
EDIT: Just did another lurker with 3038 cosmics (had to recharge glory amulets). Still though, 2260 essence per hour. And same conditions (no energy pots).
-
Haha, yea I had that problem too. Had to split my bank in two to make it readable. I'm not, you can probably adjust the height and width in photobucket using the editing tool, but I didn't want to make the picture too big.
-
Thanks for the feedback. I don't really like thieving, so that's why it's so low. ;)
-
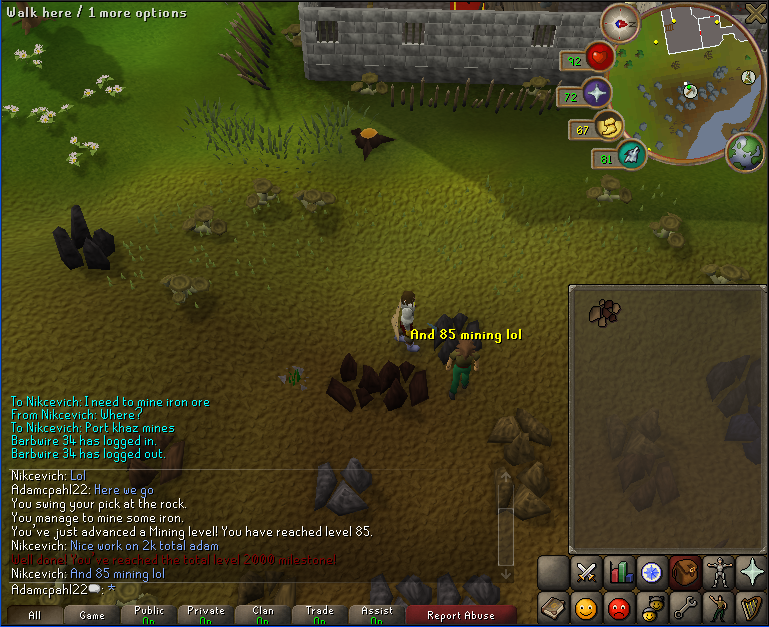
Hi, rate these pics!
[hide=85 Mining]
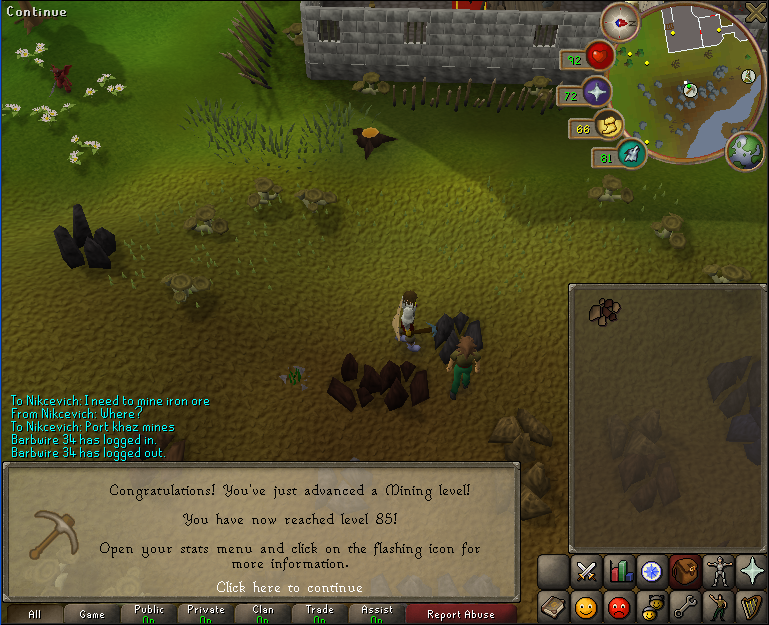 [/hide]
[hide=And 2000 Total Level]
 [/hide]
[hide=And what that does]
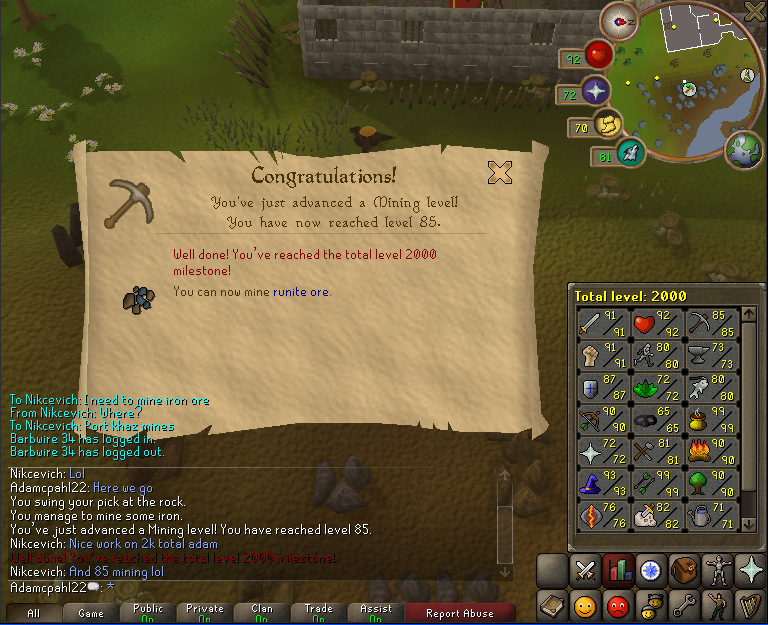 [/hide]
[hide=Total Exp when I got it]
 [/hide]
[hide=Skills]
 [/hide]
[hide=Bank Pic]
 [/hide]
Rate/Hate as you please :
-
Average Level = 77.4
Average Exp = 3,283,335
-
dang that is a sweet trip. 10/10 :thumbsup:
-
In response to whether you can hide within hides, I don't think you can anymore.
My blog had heaps of that sort of thing and now it's completely stuffed up so I've given it up :x
Nice blog btw 4/5
o.0
in Achievements (Drops, Bank Pictures and Levels)
Posted
I agree with blocking Iron and Steel Dragons, but why Black Dragons. Baby Black Dragons take like 30 minutes to do the task.
Since the advent of the Super Antifire Potion you'd be crazy not to do all 3 (assuming you can make them). A task takes 1 hour max with them + Zam Spear.
P.S. Grats on the drop though rating luck ain't really my thing